
Raising Spring Chicks: What You Need to Know Before Bringing Them Home
There’s something deeply magical about bringing home your first batch of baby chicks in the spring. Those tiny fluffballs hold so much potential—and raising them is not only rewarding, but also incredibly grounding. Whether you’re on a sprawling homestead or in a cozy urban backyard (like I once was in Brooklyn), these little peepers are a beautiful addition to your self-sufficient lifestyle.
After raising several flocks myself—from a small group in a brownstone backyard to my current thriving coop—I’ve learned a lot along the way. If you’re thinking about adding chicks to your homestead this season, here’s everything you need to know before you bring them home, straight from someone who’s done it (with plenty of mistakes and a lot of love).
1. Get Your Brooder Ready Before They Arrive
Let me be honest—when I brought my first chicks home, I was not ready. I had the romantic idea of them chirping sweetly in a cardboard box. Reality hit fast. They need warmth, safety, and space from day one.
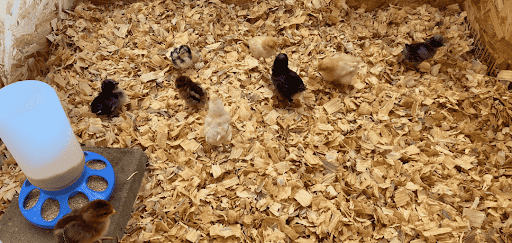
A brooder is basically your chicks’ nursery. It’s where they’ll live for the first 4–6 weeks of life while they grow strong enough to handle outdoor life. Here’s what you’ll need:
- Container: A plastic tote, a large cardboard box, or a custom wooden brooder. Just make sure it’s draft-free and gives them at least 1.5–2 sq. ft. per chick.
- Bedding: I personally love pine shavings. They absorb moisture, smell earthy, and are easy to clean. Avoid cedar—it can be toxic.
- Heat Source: A heat lamp or brooder plate is non-negotiable. Keep it at 95°F during the first week, and lower by 5°F each week after. They’ll let you know if they’re cold—they’ll huddle under the heat. If they’re too warm, they’ll scatter to the corners.
- Feeder and Waterer: Get shallow dishes made for chicks. Add pebbles to the waterer for safety in the first few days.
- Thermometer & Thermostat: Trust me, don’t wing it—get a reliable thermometer so you’re not guessing temperatures.
2. Bringing the Chicks Home – The First 48 Hours
That first day is exciting and a little nerve-wracking. The chicks are probably coming from a hatchery or farm store, and they’ll be a little stressed. Here’s what I do:
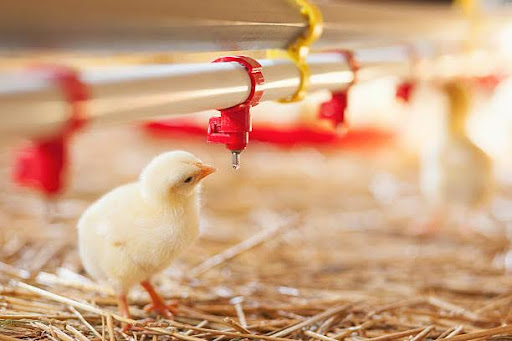
- Dip their beaks in the water right away so they know where it is.
- Offer starter chick feed, not layer feed. They need higher protein and special nutrients at this age.
- Keep the brooder quiet and calm. No barking dogs or loud music. Let them settle in.
Also—don’t forget to check for pasty butt (yes, it’s a thing!). Sometimes chicks get poop stuck to their backside, which can block them up. Gently clean it with warm water and a soft cloth if needed. It’s weird, but it can save their life.
3. Daily Chick Care: Routine, Observation & Love
The early weeks are all about creating a rhythm. Here’s what I do each morning:
- Refill clean water (chicks are messy!)
- Top off chick starter feed
- Spot-clean bedding
- Observe their behavior
Happy chicks are active, chirping, and curious. If they’re silent, huddled, or panting, something’s off—check your heat, food, or bedding.
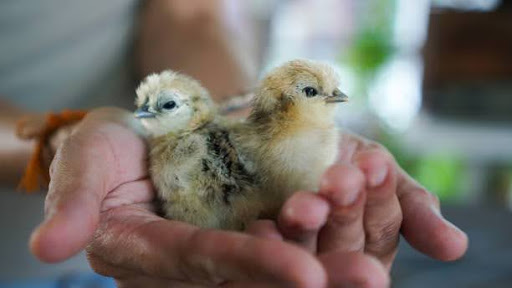
This is also a great time to bond with them. I spend time near the brooder, talk to them, and gently handle them so they get used to me. Socialized chicks grow into friendly hens—and trust me, there’s nothing sweeter than a chicken who runs to greet you in the garden.
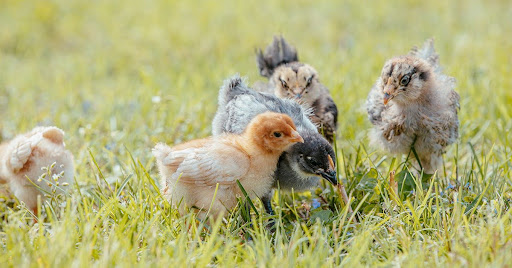
4. When to Move Them Outside
I know you’re itching to get them into the coop, but take it slow. Here’s how I time it:
- 6 weeks old is the magic number—if they’re fully feathered and the nights are warm (above 50°F).
- Introduce them to the outdoors gradually. I let them out in a secure run during warm afternoons, starting at about 3–4 weeks (supervised).
- Move the brooder into the coop for a few days if you can. That helps them adjust to the sights and smells.
- At 6 weeks, transition to the coop—but still keep a close eye for signs of stress or cold.
Don’t rush this phase. They need time to grow into their feathers—and confidence.
5. Introducing Chicks to an Existing Flock
If you’ve already got hens, you know the pecking order is real. Chickens aren’t always welcoming to newcomers, even cute fluffy ones.
Here’s how I manage it:
- Keep them separate but visible for a week or two. I use chicken wire dividers or a grow-out pen.
- Wait until they’re nearly the same size. Full-grown hens will often pick on smaller birds.
- Introduce during a supervised free-range session, when there’s room to run.
- Add extra feeders and waterers so the chicks don’t get blocked out.
It takes patience, but eventually, they’ll find their place in the flock.
6. Final Tips from My Homestead#
- Trust your instincts. If something doesn’t feel right, check it out. Chick care is more art than science.
- Journal your journey. I kept notes on growth, feed, and behavior—it helped a lot.
- Have fun! Chick days are fleeting, and they grow so fast. Take photos, enjoy the chirps, and celebrate every little milestone.
Conclusion
Raising spring chicks isn’t just about fresh eggs—it’s about life, learning, and connection. Whether you’re starting out with three little peeps in a cardboard box or planning your fifth flock, it’s a journey filled with joy (and a little poop). Embrace the process, trust yourself, and remember: every homesteader starts somewhere.
Happy chick raising! 🐣