Preparing Your Soil for Spring Planting: A Homesteader’s Guide to a Thriving Garden
Spring is right around the corner, and for homesteaders and gardeners like us, that means one thing—it’s time to get our hands in the dirt and prepare our soil for a season of abundance! The key to a lush, productive garden starts with healthy, nutrient-rich soil. Before we start planting our tomatoes, squash, and vibrant zinnias, we need to take a few essential steps to ensure our garden beds are primed and ready.
I’ve been through the trial-and-error process of gardening—sometimes winning, sometimes learning (because we never really lose in gardening, do we?). Over the years, I’ve found that taking the time to properly prepare the soil before spring planting makes all the difference. So, let’s walk through the steps of testing our soil, adding amendments, and optimizing our garden beds for the best growing season yet!
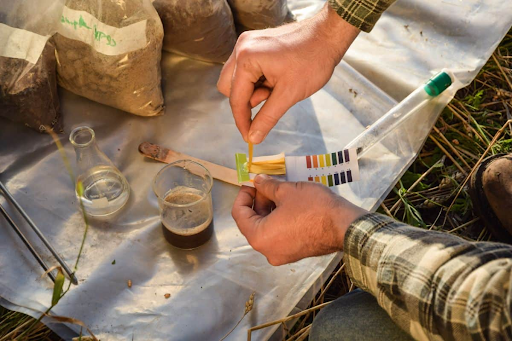
Step 1: Test Your Soil (Because Guesswork Won’t Cut It!)
Before we can fix anything, we need to know what’s going on beneath the surface. Soil testing helps us determine pH levels, nutrient deficiencies, and whether our soil is too sandy, too clay-heavy, or just right.
How to Test Your Soil
There are two ways to test your soil:
- Use an At-Home Test Kit: These are easy to use and provide quick insights into pH and basic nutrient levels. You can find them at most garden centers.
- Send a Sample to a Lab: Your local agricultural extension service or a private lab can provide a more detailed analysis. You’ll get recommendations tailored specifically to your soil’s needs.
What to Look For
- pH Levels: Most vegetables thrive in slightly acidic to neutral soil (6.0–7.0 pH).
- Nutrient Deficiencies: Low nitrogen? Your leafy greens will struggle. Lacking phosphorus? Root crops like carrots and beets won’t reach their full potential.
- Soil Structure: Too sandy and it drains too quickly; too clay-heavy and it retains too much water.
TIP: If your pH is off, you can amend it naturally. Lime raises pH, making soil less acidic, while sulfur lowers pH, making it more acidic.

If you’re like me, you probably enjoy getting hands-on with your soil. I always recommend observing its texture: does it crumble easily in your hand, or does it clump together stubbornly? Feeling your soil and knowing its structure can tell you a lot about what amendments it needs.
Step 2: Nourish Your Soil with Organic Amendments
Healthy soil is alive, teeming with beneficial microbes, worms, and organic matter. If your soil is depleted, your plants will struggle, no matter how much water or sunlight they get.
Organic Amendments to Consider
- Compost: The Gold Standard
- Enriches soil with nutrients
- Improves soil structure
- Encourages beneficial microbes
- Helps retain moisture
- How to Use It: Spread a 2-3 inch layer over your garden and mix it into the top 6 inches of soil.
Composting is one of my favorite homesteading activities. There’s something incredibly rewarding about watching kitchen scraps and yard waste transform into nutrient-rich goodness for the garden. Plus, it’s completely free and sustainable!
- Worm Castings: Black Gold for Plants
- Packed with essential nutrients
- Helps soil retain moisture
- Encourages healthy root growth
- How to Use It: Sprinkle a light layer over your soil or mix it into potting mix for seedlings.
I started worm composting a few years ago, and I’ll never go back. Vermicompost (worm castings) gives my plants a boost like nothing else. If you’ve never tried it, I highly recommend setting up a small worm bin!
- Chicken Manure: Powerful but Potent
- High in nitrogen (great for leafy greens!)
- Contains phosphorus and potassium for strong roots
- How to Use It: Always compost chicken manure before using it, as fresh manure is too strong and can burn plants. Once composted, mix a thin layer into your garden beds.
If you raise chickens like I do, their manure is an amazing fertilizer. The trick is composting it properly so that it’s safe and beneficial for plants.
TIP: If you keep backyard chickens like I do, you can collect and compost their bedding for a nutrient-rich soil booster.
Step 3: Optimize Your Garden Beds
Now that we’ve tested and amended our soil, it’s time to prepare the garden beds for planting.
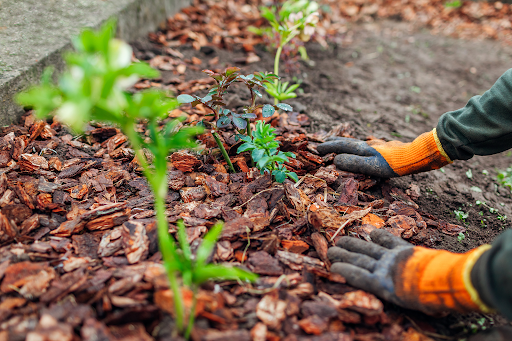
Clear Out Weeds and Debris
Leftover weeds and old plant material can harbor pests and diseases. I like to pull everything out by hand, making sure to get the roots, so they don’t grow back.
Loosen the Soil
Compacted soil restricts root growth and water absorption. Use a broadfork or garden fork to gently aerate the soil. If you’ve had issues with poor drainage, now is the time to fix it!
Add a Fresh Layer of Mulch
Mulching is like giving your garden a protective blanket. It:
- Retains moisture
- Suppresses weeds
- Regulates soil temperature
- Adds organic matter as it breaks down
I love using straw, shredded leaves, or grass clippings as mulch—they’re free, natural, and incredibly effective!
Step 4: Plan Your Planting Layout Wisely
With your soil in top shape, think about how you’ll arrange your plants for the best results.
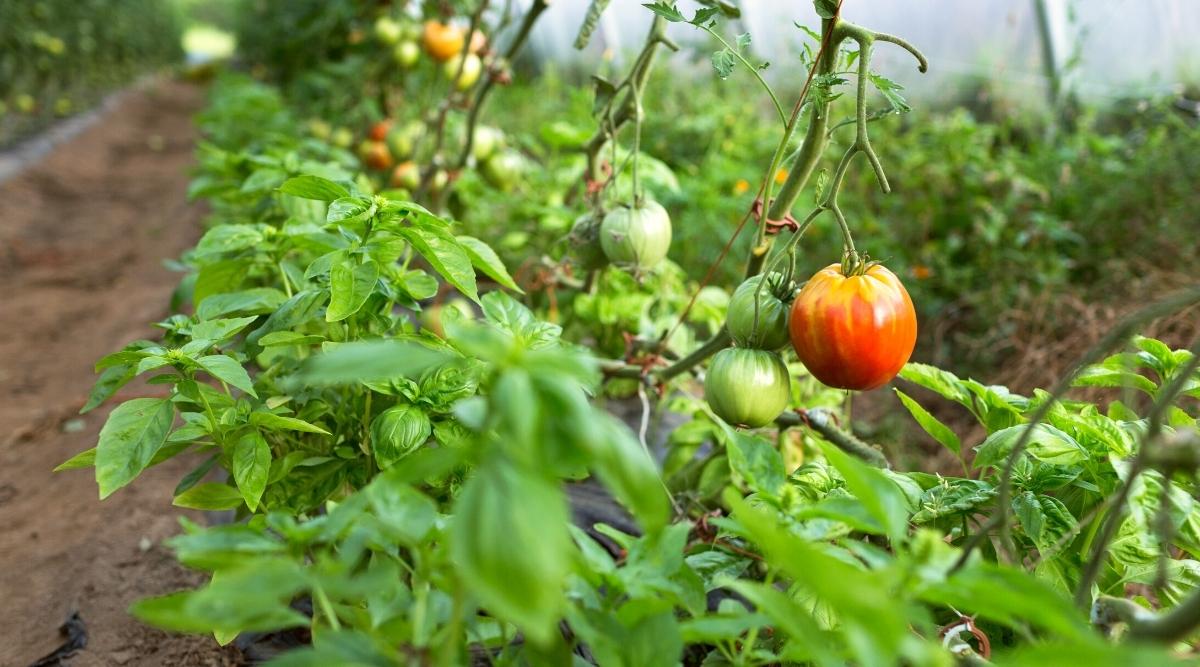
Companion Planting
Some plants thrive when grown together, while others compete for nutrients. A few winning combinations:
- Tomatoes & Basil: Basil repels pests that love tomatoes.
- Cucumber, Yellow Squash & Zucchini: These summer staples grow well together and share similar watering and soil needs—just be sure to give them space to sprawl!
- Corn, Beans, & Squash (The Three Sisters Method): Beans fix nitrogen in the soil, corn provides support for beans, and squash shades the soil to retain moisture.
Crop Rotation
Avoid planting the same crops in the same spot every year. This reduces disease buildup and balances soil nutrients.
Final Thoughts: A Season of Growth Awaits!
If there’s one thing I’ve learned in my homesteading journey, it’s that soil is the heart of the garden. When we take the time to prepare it properly, we set the stage for a thriving, productive season.
As you step outside to prepare your own beds, remember: gardening is a journey, and each season teaches us something new. With rich soil beneath our feet, a little bit of patience, and a whole lot of love, we’re on our way to an incredible spring garden.
Happy planting, friends! Let me know—what’s the first thing you’re planting this season?